Cycling hard through the morning mist trying to keep up with cyclaholic editor of Active Traveller Neil Pedoe I'm struck by just how uncomfortable I am.
My knees hurt, my lower back hurts, my manly bits hurt and my wrists feel strained - this can't be right, surely?
I plough through the rest of the journey - our commute to work through the lanes of the Cotswold countryside - trying to put the pain to one side so that I can enjoy the moment, but even in my most zen like meditative state I can't ignore the discomfort.
Neil suggests that I get a bike fit, something that's really come to the fore in recent years. When you think about it, bike fit makes perfect sense: we're all built differently and have our own little physical foibles, from old injuries to learnt behaviours that can cause pain and discomfort on a badly set up bike.
A bike fitter will measure your geometry and then attempt to make adjustments to the bike to match.
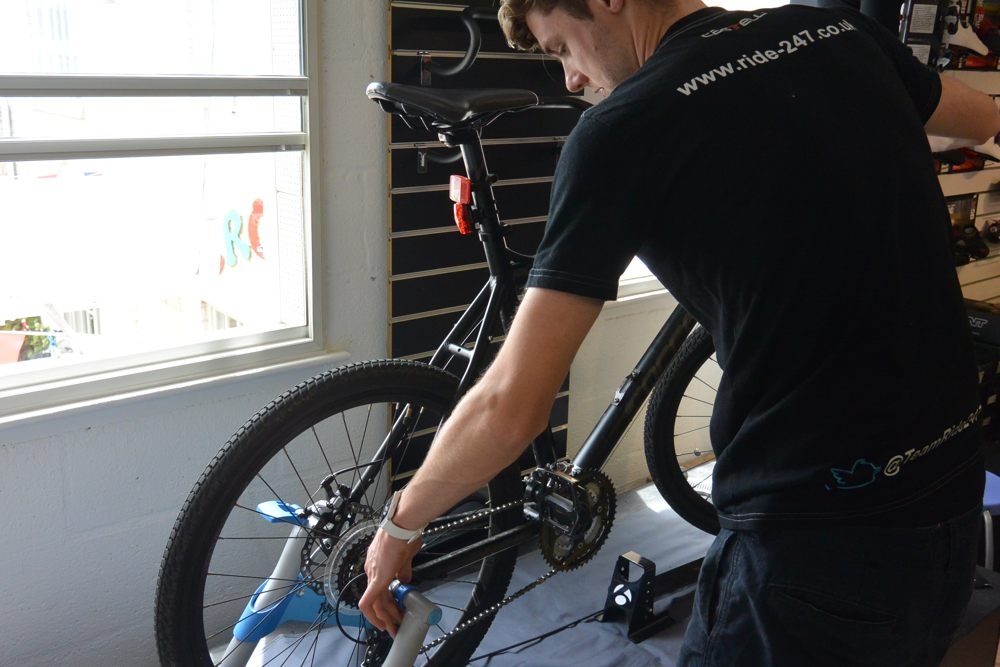
Convinced by the science I headed to my local bike shop, Ride 24/7, to see what they could do for this poor suffering individual.
We started by discussing my vital stats - height, weight, any current injuries, what kind of riding I do (and want to do), and a bit of information about my bike.
I'm pretty sure the guys at Ride 24/7 aren't used to seeing a cheap high street-bought hybrid bike in their shop amongst the high end carbon fibre specimens and colourful lycra - all the same, I just about managed to put my pride to the side and tried not to sound too apologetic about my choice of two-wheeled transport.
The bike's geometry was measured up with lots of head scratching, "hmms" and" aaaahs" and a final conclusion of "this is strange". Relief was felt at knowing that "it's not me, it's the bike" and that from now on I might not be screaming for mercy on my next ride.
The next step of the process was largely done with me on the bike - the bike fitter taking various measurements including saddle height and set-back as well as the angle of the knee with the pedal at the downward stroke. Putting all of this together enabled him to build a picture of where I was on the bike and where I needed to be which in turn informed his adjustments.

After a good bit of tweaking, trial and error, a few spacers here and a new handle bar stem sticky out thingamy (what's one of those called?) there, my bike fitter, Mitch conceded to the fact that he could adjust no further and the geometry of the bike was always destined to be a little strange and uncomfortable, even when compared to a race ready road bike!
Riding the bike, or as Neil would call it, "Bike Shaped Object" since has revealed that it feels a great deal more comfortable than it did before. The position certainly feels more natural and utilises the larger muscles of the glutes and upper thighs when pedalling rather than feeling like all the strain is going through the knees. That said, it's never going to be an ideal bike for long journeys.
It was a sad moment finding out that my initial purchase into the world of cycling was perhaps a little ill-informed but at the same time, overall relief that there might just be the right bike out there for me.
Perhaps the most pertinent lesson I learnt from the process was the importance of buying your bike from a shop with knowledgeable staff who will often care as much about you getting the right bike as they do about selling you a bike at all.
Three quick steps to check your own bike fit
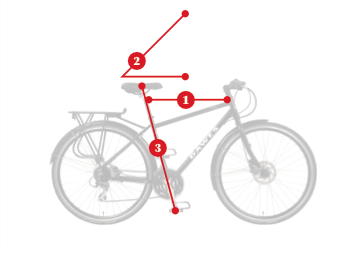
1 Size Matters
Most manufacturers' bike 'sizes' are described by their 'virtual horizontal top tube length'. This sounds techy but is simply a horizontal measurement you can make on any bike, from the centre of top of the head tube - where the steerer for the front fork emerges from the front of the top of the frame - to the centre of the seat tube.
In practice this means that if you're between 5ft 3in and 5ft 7in tall you'll need a bike with a 52 or 53cm top-tube. If you're between 5ft 8in and 5ft 11in tall then you'll likely need a 54-56cm top-tube. Riders from 6ft to 6ft 4in tall should try sizes with a top-tube from 56 to 58cm. Not many bike manufacturers make bikes outside this sizing range, so you might be looking at a custom-made bike.
2 Reach for the 'bars
The size of the frame will affect your reach to the 'bars, which is one of the most important factors for comfort.
Operating the brakes should be easy too - you should be able to hook the levers with your first and index fingers.
Once riding, you want a back angle of about 45 degrees, with your hands lightly on the handlebars, and your arms slightly bent. Don't run the bars lower than the saddle - it will give you a sore neck.
3 Saddle up, or down
The height of the saddle is crucial for comfortable, efficient and injury-free pedalling. Too low and you will overload your knees; too high and you'll give yourself a sore lower back. Don't assume that the saddle height of a bike is right for you just because it is the 'right size'.
For a starting point, measure your inseam by pushing a tape measure up into your crotch and measuring down to the floor. Multiply this distance by 109% for your saddle top to pedal distance, with the pedal at the six o'clock position.
To check the saddle height, get on the bike leaning up against a wall for support. Rotate the pedal to the 'six o'clock' position, and rest your heel on the pedal. If you can't reach the pedal without stretching then your saddle is too high. If your leg is bent, then it is too low.
For friendly local service in the Cotswolds visit Ride 24/7