
Oh no! There's a leak! It's not massive, nor fatal, but a leak nonetheless, and one that is starting to soak our carefully stowed gear inside the canoe with a fine but persistent spray of Lake District water.
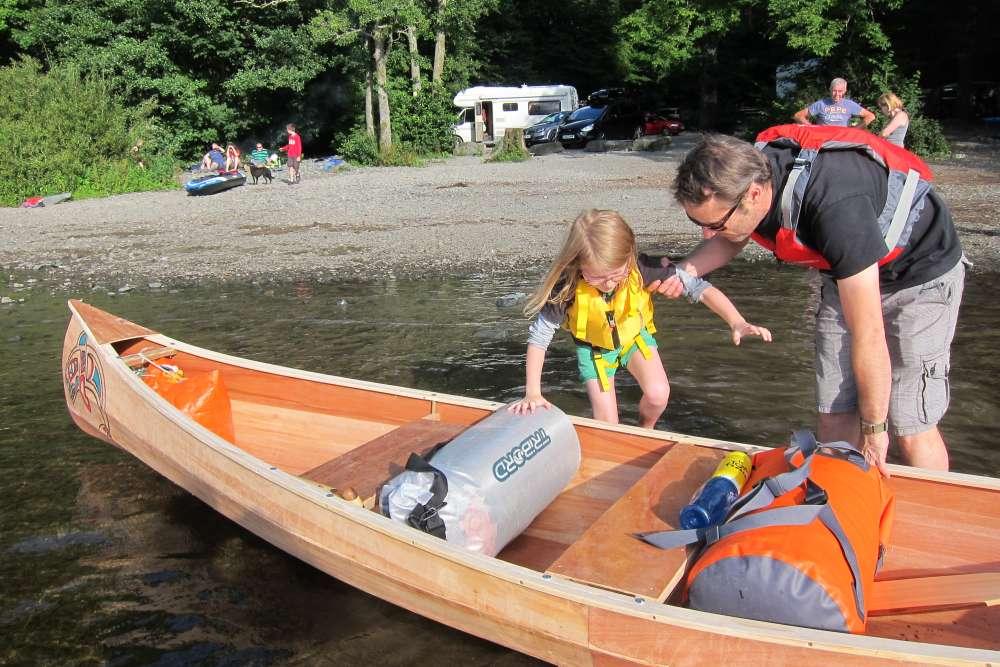
Only minutes earlier we were proudly carrying our freshly built Lakelander Canoe down to the edge of Derwent Water for the first time, gaining a "Wow, look at that!" from a couple in a deckchair soaking up the glorious early evening views across Derwent Water.
Swelled with pride by the interest in our boat, which we'd only just finished making with our own hands, I loaded food, sleeping bags, bivvy sheet, wife and two children into the canoe, before pushing off for its maiden voyage. Just in case, and for more kudos, of course, I informed anyone who would listen of our intentions to wild camp on one of the lake's islands.
But my pride was short lived, and my swelled chest soon deflated, as our maiden voyage lasted all of 30 seconds. Heads held extremely low, we beat a hasty retreat back to shore for some last, or should I say first-minute repairs.
The build
On a brisk but sunny Friday morning we met Dan, our canoe guru for the next few days at the Strickland Arms pub in Great Strickland - a quintessential Lake District stone-built village, with one main difference: being just outside the National Park, there are no summer crowds. Forming up a little convoy with the rest of our group, we all followed Dan out of the village and down a track, to a working farm and his 'Orca Canoe Building Workshop' venue, inside an old barn.
There were five groups of us, each to build their own canoe; while it's possible to build one on your own, at least one set of extra hands is of great value. I was here with my wife and two kids, aged 6 and 8 - and I was hoping not only to build a canoe, but also to leave with all my family's fingers still attached.
Each group was allocated a workbench, on which sat a stack of four sheets of plywood. The top sheet had already been marked, in pencil, with the outline of the canoe sections, and the first job was to cut them out with a handsaw.
Having clamped the four sheets together, and getting the kids to sit on them too for added stability and group involvement, we set about the arm numbing job of sawing out each of the three primary shapes.
"Why don't we use jigsaws?" I ventured.
"Well, we tried that," said Dan, "but it was really noisy and it got incredibly dusty in here, making the barn a horrible place to be. Also there's a greater connection between you and the canoe when you know you've cut its shape with your own hand."
That was me not only told, but fully converted too, and I went back to my sawing with an almost religious zeal.
Having cut out all our sections, we went outside for a well-earned rest in the farmyard. Sitting on a ramshackle selection of chairs, we drank tea and ate our packed lunch, as the local farmer set off for his fields with a pack of overly excited sheepdogs.
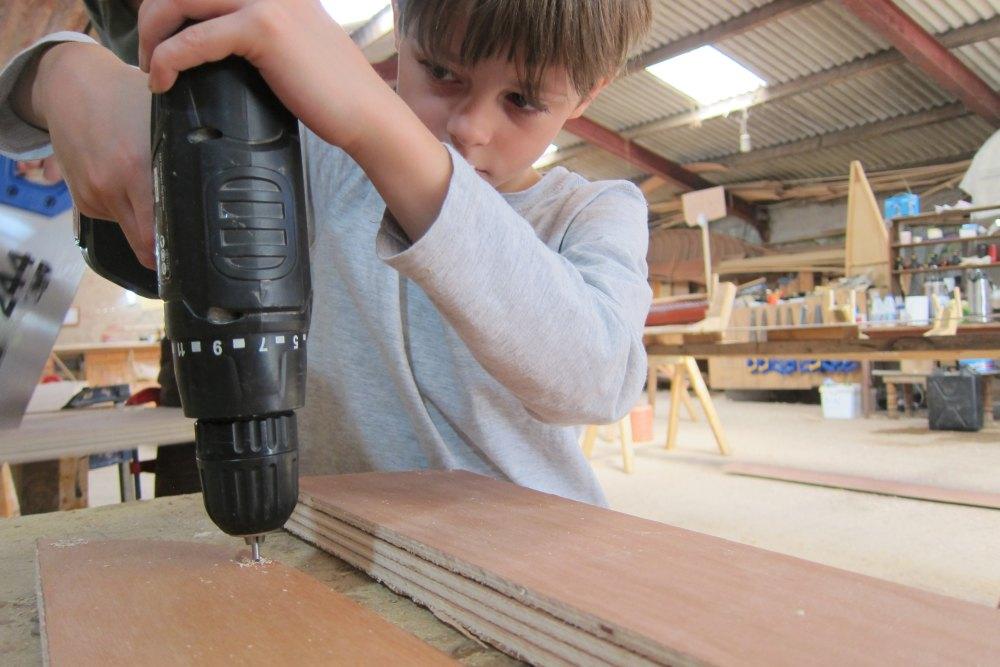
Our next step was to drill a few holes at the bow and stern, and then all along the top panel; my son pulled the drill's trigger as I carefully guided the drill bit. Then all four of us lifted the individual pieces into place on a large jig, screwing it firmly down at the centre. The kids, surprisingly still very interested, then cable-tied through the predrilled holes of the bow and stern, pulling all the shaped planks together. We then threaded a long length of baler twine back and forth underneath the canoe and through the predrilled holes on the top edge, which the kids thought was great fun. As we pulled the string taught, lo and behold; the once flat sheets finally, and almost magically in the children's eyes, took on the shape of a canoe.
Arriving fresh faced and brimming with enthusiasm on the second day (well, after our first coffee at least) we set to gluing, taping along all the joins between the sections that we had only pulled together the day before. This, obviously, was a job for the kids, although when epoxy resin glue dries it really does stay stuck, so great care was instructed, if not always applied.
By the afternoon interest was fading, so the kids started their own projects. Using their imagination and the scrap wood left over from yesterday's sawing, they both decided to build their own mini canoes, with Dan's help. With the kids occupied, happy to be let loose with a junior hacksaw, hammer and nails, my wife and I got to work building the canoe's seats and lifting handles, which would be fitted later on in the process.

Dan's workshop is a very chilled affair, with instruction and demonstrations regularly given, along with any help needed on request. In reality you have a set amount of tasks which need to be completed each day to allow sufficient time for drying, and once finished, often around 3pm, you're free to take an afternoon hike, go to the pub...
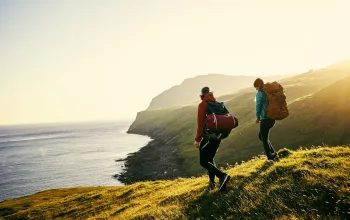
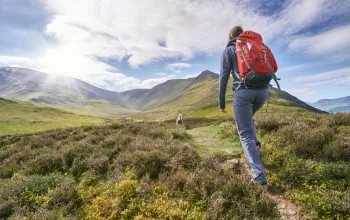
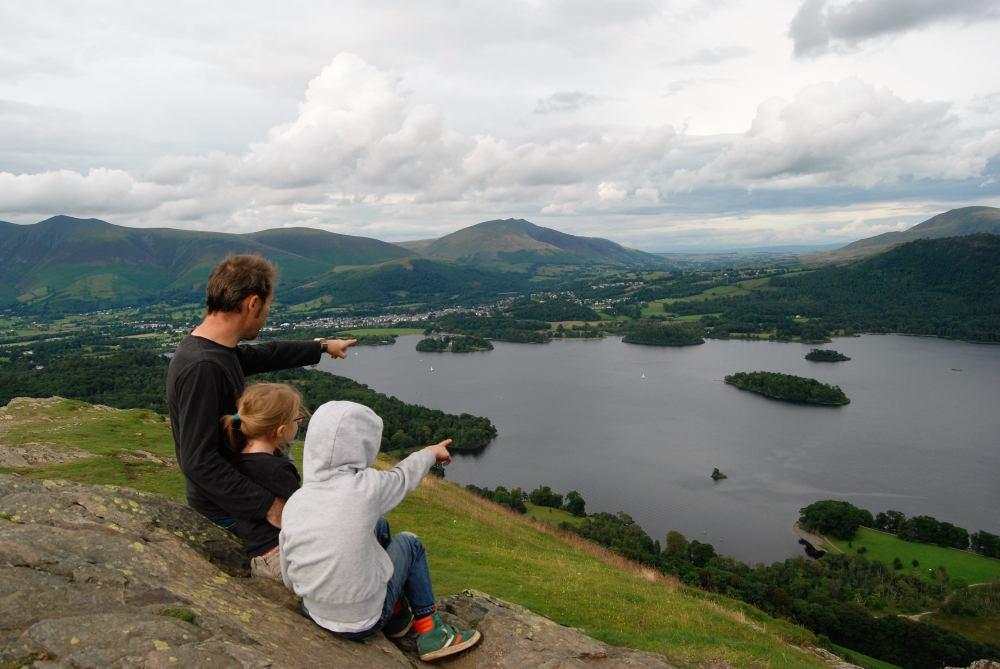
While I would have loved to go for a pint, we decided to take advantage of a glorious evening and headed for a hike up Catbells, on the edge of Derwent Water - mainly to recce from above and try and spot a good island for our canoe's first micro adventure, but also to expel some of the children's energy. All children are different and whilst ours had behaved and engaged wonderfully at the workshop, they had found it necessary to expel all their pent-up energy the previous evening by literally sprinting and climbing all over Kendal's streets and eateries.
On the third day, the kids continued to build their own little rafts and canoes, while we fitted the all-important gunnels to the top edge of the sides of the boat. It's the gunnels, along with the glue, that hold the canoe in shape once it's removed from the jig. It's a slow process of gently bending and screwing into place two lengths of 50 x 25mm pine along each side.
Once fitted, and with fingers crossed, we unscrewed the boat from the jig: there's a few creaks, but fortunately no loud cracks. Flipping the canoe over, we then started filling all the joints and holes - though clearly I must have missed one!
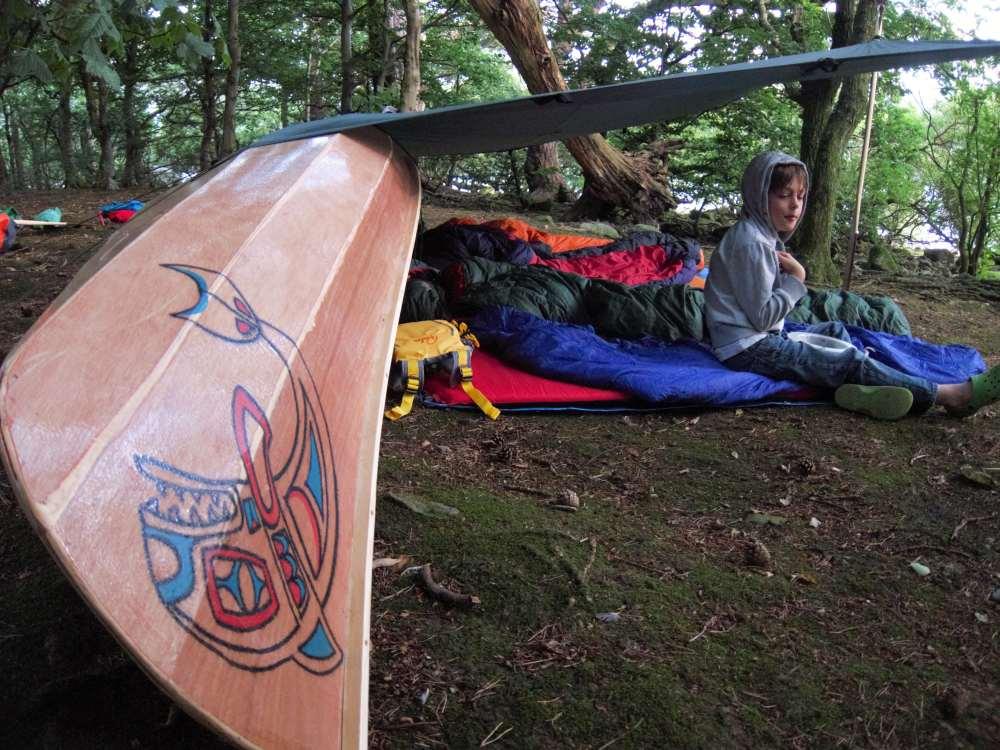
With the end in sight, we sanded and planed all the joints before sealing all the wood with epoxy resin. The kids took great joy in soaking rollers in resin and spreading it everywhere, having been fully briefed that if they missed anywhere we'd all sink. I finished fixing the seats and small decks into place, while my wife got all arty, designing and painting a North American style orca whale on the front. Other groups chose to paint the outside of their boats, which looked great, but we left ours plain, as the epoxy resin dries like a gloss varnish.
Prepare to launch
Gingerly loading our finished canoe onto the roof on our car, resin still tacky, I drove - with the speed of a father driving home their firstborn from the hospital - to the shores of Derwent Water... only to discover the aforementioned hole.
Duct tape sprung to mind, but before I dug though the car boot, a kind onlooker offered us some superglue and a piece of plastic bottle. To my utter surprise it worked perfectly, and five minutes later, our adventure was back on.
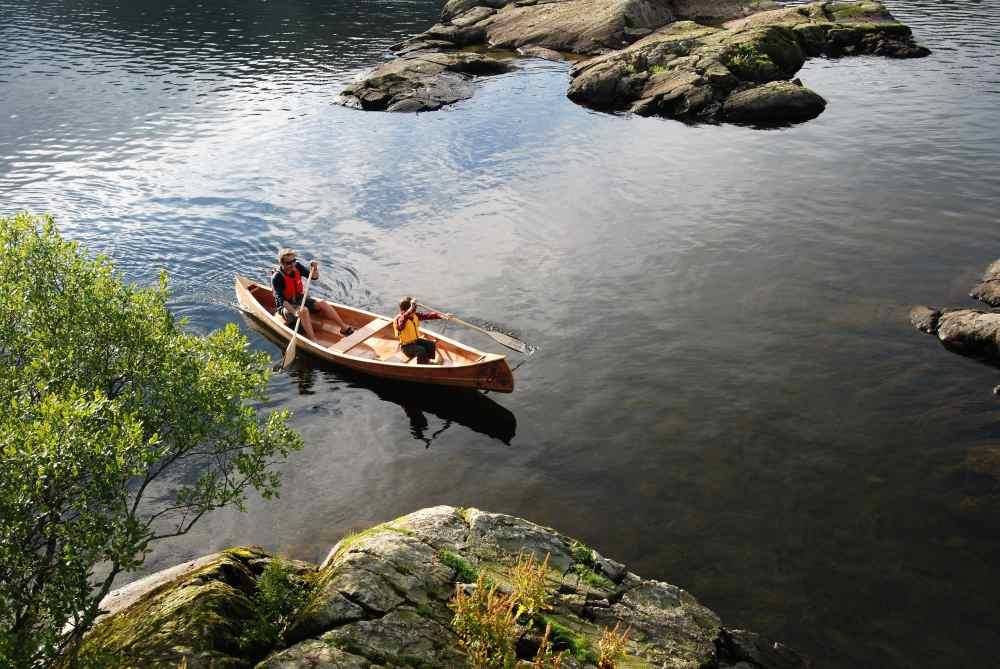
Back on the water, beneath a now crimson sky and far from shore, I couldn't stop a nagging thought that only four days ago this canoe - holding my whole family, and all we needed for an overnight expedition - was simply some flat sheets of wood and a pot of glue.
Eventually I managed to put the idea of a catastrophic boat failure to the back of my mind, and started to marvel at the heightened senses which being in a canoe brings on. There's something truly magical about sitting this low in the water on a craft that emits no noise, other than the gentle lapping of ripples against the hull. We paddled for an hour, with the kids dragging their tiny canoes along on pieces of orange twine, towards a distant spot of green amongst all the blue.
Rampsholme Island was our chosen destination, and as we circled it looking for a landing spot, we soon discover a shingle spit; the perfect place to land and unload. Weeks later when in a darkened cinema we saw the very same spit being landed on in the new adaptation of Swallows and Amazons, which led to the kids shouting "That's our island!" only to be greeted with a chorus of shushes.
We hadn't brought a tent with us, so our first job was to create our home for the night. We flip the canoe on its side, and stretch a bivvy sheet between the boat and some trees, using a paddle as a stabilising pole. Finally we set out our sleeping gear on a ground sheet, before cooking dinner to the sound of clucking geese starting to roost around us.
Watching the sun set from our spit, as great crested grebes dived for a late snack, we'd achieved our family goal for the long weekend. In just 4 days we'd built a canoe from scratch, travelled in it, and were now about to sleep under it. We'd all fallen in love with its simplicity, and as I drifted into sleep with our new canoe as my roof, and with the kids already asking about our next canoe adventure, I just prayed that the super glue held firm and that we didn't sink on the way back to the car...
Kit List
Buoyancy aids are essential, but remember it's not a life jacket. A buoyancy aid will keep you afloat, and is the aid of choice while canoeing, due to its smaller size. A life jacket will ensure you float on your back, but its shape is a hindrance while paddling the canoe. When sizing for your children remember to check weight advice. wetsuitoutlet.co.uk
Orca sell beautiful wood paddles they make themselves onsite, as well as strong Redtail wooden paddles for £50, made from 3 x laminate Ash. If you simply intends to paddle flat water, rather than rapids, Decathlon sells a light weight wooden paddle for only £21.99.
Try as you might your feet will get wet, so sandals that won't come off are best. Something like the Teva Terra-Fi Lite which has a great sole and a firm on foot fixing is ideal.
Dry bags or barrels are vital to keep your camping gear dry, or your lunch on a day trip. Again, Decathlon has a good selection of large strong dry bags. Two TRIBORD 60l duffel bags, £34.99 each, should be enough storage for a simple overnight trip. For smaller items, such as camera, car keys, sandwiches, Osprey or 'Sea to Summit' offer a good selection. cotswoldoutdoor.com
Bivvy Sheet If you want a really wild experience, forget the tent and simply take a bivvy sheet or/and a tarp. DD Hammocks not only sells super light weight hammocks, perfect for adults but not so great for kids, but also some great waterproof bivvy sheets, with numerous side and mid loops.
If you want to keeping things small and light the SOTO Muka Stove is a fuss-free single burner that doesn't need cleaning, in the same way most tiny jet stoves do. It runs on unleaded petrol and White Gas and costs from £115. rockrun.com
Our trip
Orca canoe building workshops are run most weekends between March and September. The course costs £495 for the larger Lakelander Canoe (4 days), and £410 for the smaller single person Mayfly Canoe (2 days). The course includes all materials and instructions, but not accommodation or food.